If you have Visual Studio subscriptions assigned as part of one agreement and your company purchases a new agreement, you might need to migrate subscribers from the current agreement to the new one. This article explains how to move your assigned subscriptions to the new agreement.
When you move your subscribers to the new agreement, here's what happens:
The process for moving subscribers to the new agreement consists of three steps:
Note the following considerations before you start this process:
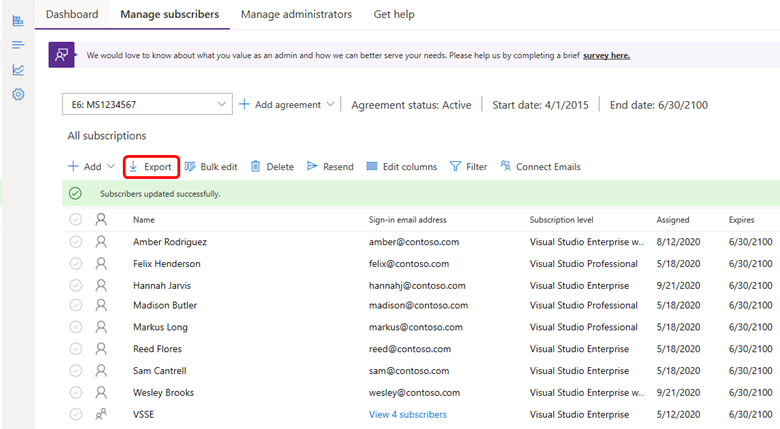
The first step to migrate your assigned subscriptions from one agreement to another is to export your current subscription assignments as a CSV file. In the Visual Studio Subscriptions admin portal, you can export a list of your subscribers and details about their assignments.
This information includes:
The list is exported as a CSV file that you can easily open in Microsoft Excel so you can prepare it for uploading to the new agreement.
To export your assigned subscriptions:
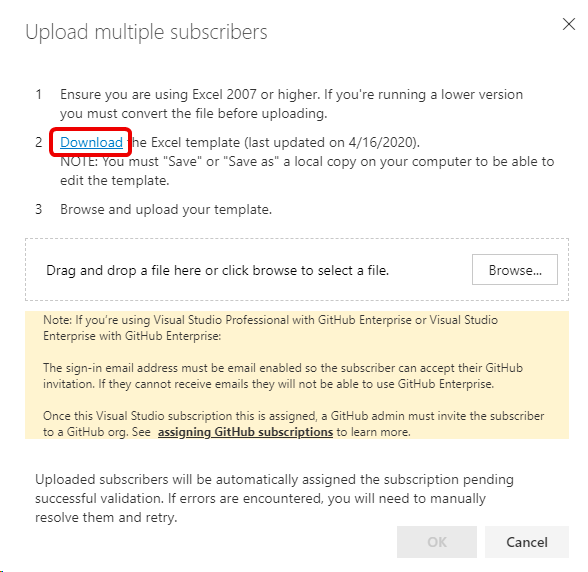
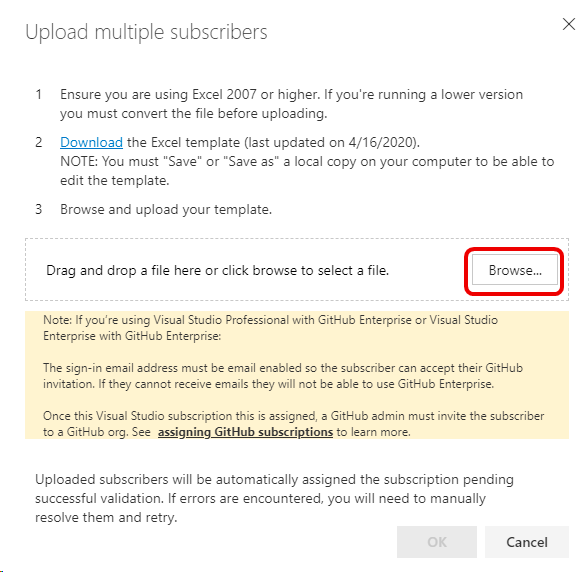
Take these steps to open your exported subscriptions list and move the relevant data to a template for upload to the new agreement:
Not all the fields in the exported CSV file are needed in the file used to upload your subscriptions to the new agreement. The fields appearing in bold in the previous list appear in the template used to upload your list.
Download the Excel template that you use to upload your subscriptions.

Note The order of the columns in the exported subscriber list is different from the order in the template. The names of the columns also differ slightly. The following table shows the names of the fields that are common to both spreadsheets:
| Export list | Bulk add template |
|---|---|
| Subscriber Name | Name |
| Sign-in Email | |
| Notification Email Address | Notification Email |
| Subscription Level | Subscription Level |
| Reference | Reference |
| Downloads | Downloads |
| Country | Country |
| Language | Language |
Important Do not copy data from the Subscription GUID column into the bulk add template. Leave that column blank in the Bulk add template. Adding the GUIDs will cause the upload to fail.
Tip If you have a lot of subscribers, you might find it helpful to use keyboard shortcuts when you're copying and pasting data. To select all the entries in a column like "Subscriber Name", select the first entry in the column (not the column heading), select and hold Ctrl+Shift, and then select the Down arrow key. This will select all the data in that column.
After you add your subscribers to your new agreement, you should remove them from your old agreement. Removing them will prevent them from getting notifications about their old subscriptions.
For help with managing Visual Studio subscriptions, see Visual Studio Subscription support.